Translate

Sunday, December 7, 2014

HOW TO RENDER A REALISTIC WATER IN KERKYTHEA

Today, we’re going to show a brief process of rendering a realistic water in kerkythea. Kerkythea is a very good software in computer graphics and architecture world. Kerkythea is a completely free to use software that can be used in both educational and commercial usages.
Kerkythea has featured its both unbiased and biased rendering engines that can actually give you a very superb and explicit results in rendering. It also has provided us numerous integration into other softwares like Sketchup and Autodesk 3dsmax.
Our video here shows the basic process in rendering a realistic water inside kerkythea after creating plane in sketchup. At the first part of the video, we show you how to change sky backgrounds in kerkythea through the use of “insert globals” tool pane above. Globals are made of high dynamic range images and you can download it for free at http://www.kerkythea.net/ (their official website)


Going to the material, you can also apply numerous materials to change the existing one by applying downloaded materials from the website we have already mentioned. you can also create your own by adjusting the diffuse, the reflection, refraction and other settings.
In making a realistic water in kerkythea, you have to mind the idea that water has a glass effect so it is logical to apply glass material on water for refraction and reflection effects. you can also create your own by adjusting the index of refraction for about 1.5, and choosing white color for 100% reflection and refraction (equal to dielectric glass)
After the reflection and refraction issue, Adjust or put a bitmap in the Bumpmapping section. Bumpmaps will allow you to create distortion on the material either waves, roughness, etc. In water, you must choose a bitmap that represents waterwaves. At the video, you can see how the strength of a certain bitmap can be adjusted from 0- to infinity depending on you.
Now, hit render and see the result on yourself!

Saturday, December 6, 2014

HOW TO CONVERT AUTOCAD 2D PLANS INTO SKETCHUP 3D MODELS

Autocad and Sketchup are two great softwares in cg and in engineering drawing world. Autocad had already started its Sketchup integration using Sketchup import plugin tool that was already released after the Autocad 2013 was unveiled in public. 

Sketchup pro on the other hand has provided us features in importing Autocad drawings. Now, we would like to provide you our simple tutorial on how you are going to use this feature to convert your Autocad 2d plans into Sketchup 3d model. 


HOW TO CREATE ROADS USING SHAPEBENDER PLUGIN?

Shapebender plugin in Sketchup is a great plugin for road construction and pipe modeling. Shapebender plugin can be freely downloaded in extension warehouse which can be directly installed inside Sketchup using Extension warehouse tool or you can install it manually by downloading it in this link: CLF shape bender

Allow us to show you our tutorial video on how you are going to use this plugin in 3d road construction:


Wednesday, November 5, 2014

BUILDING DESIGN 1

Last Semester, we had done some pretty tough projects. Building design 1 had given us a requirement to make plans and estimate cost analysis for Two-Storey R-2 residential Building. Luckily, we had accomplished all the required tasks that were given to us by our instructor. Here is a glimpse of our designs:


Germono, Jeffrey


Pabilonia, Justin


Gina, Robert Kristoper


Poyaoan, Mark Patcholo B.


Saturday, November 1, 2014

CHURCH MODEL

The following model is conceptual. It does not exist in reality. The softwares used here are Sketchup and Thea Render. The concept is the Church on the Hill according to what have been said in Matthew 5:14


Matthew 5:14 
"You are the light of the world. A city set on a hill cannot be hidden."


The theme is to publicly pronounce and proclaim Christ to all so I decided to build a Church on a hill.
The following images are the output. The doors have stained glasses depicting the Stations of the Cross and the Scene where Christ gave the keys to Peter (Petrine Primacy). There is also a presentation of the altar and the Adoration Chapel of the Church model.


LANDSCAPE MODELING AND RENDERING

We are aware of the fact that the Earth itself is not flat. Of course, our planet is not just flat plane but it has series of formations such as mountains, hills, trenches, valleys, etc. Our favorite 3d software has the ability to create landscapes according to the topographic features you want. Sketchup has this plugin that can really do amazing 3d models of mountains and landscapes you want to draw through the availability of 2d contour maps.

Sandbox tool is the solution.

You can actually learn how to draw landscapes in Sketchup by watching tutorials on youtube such as this (sandbox tutorialsandbox scratch). We also made a video for the sandbox scratch tutorial for you to easily learn how to create landscapes.


Now, using proxies and models, you can now put models on the scratch like trees, grasses, and vegetations and prepare for rendering the scene.

The Final Output


Church model on hilly landscape

Thursday, October 30, 2014

INTERIOR RENDERS IN THEA

JAP Renders admins are not experts in rendering but we are quite experienced enough to create 3d models and rendered images. We always make exterior views in sketchup but we are so glad to say that we can also create house interiors and can even design one. Rendering interiors is quite hard and it takes a very long time of cooking. It requires lights (pointlights, spotlight, and IES light) to brighten and to lighten up the images. It has to be detailed as possible and it has to be simple, colorful and has a good color scheme. (note that the admins are not Architecture students)

In this article, we are going to show you the simple processes we do in doing and rendering interiors

Proxies
the Sketchup raw model (not yet rendered)
As you can see from the image above, the boxes in the table are all proxies. Proxies are big help to reduce the size of your Sketchup file and therefore can save your file from consuming a lot of memory. In Thea Render, creating your own proxy is so easy. You just need to open the Sketchup model for you to create one and then choose the "Render Selection mode" in order to render the selected model. Stop when you desire it and save it as "mod.thea". You will notice at the Thea browser plugin that the selected model itself will appear. 

Lights

Lights can be easily inserted in your model through Thea tool. You can insert them as pointlights, spotlights and IES light according to what you want. You can also create rectangular lights by assigning a unique texture for your light and will edit it through Thea tool by means of activating the "emitter".

Others
Aside from those things above, you must consider some reflective materials such as floor, glass, mirror, etc in order for you to achieve a photorealistic image of your interior design.

The Final Output
Thea can create high-quality images so there is no need for you to edit it in photoshop or any other photoediting softwares. But to improve more the image, you can use Picasa. Allow us to show you the rendered image of the above model. This was rendered by thea and was further improved by Picasa.


rendered image through Thea Render


Wednesday, October 29, 2014

2ND PROJECT (GERMONO'S DESIGN)

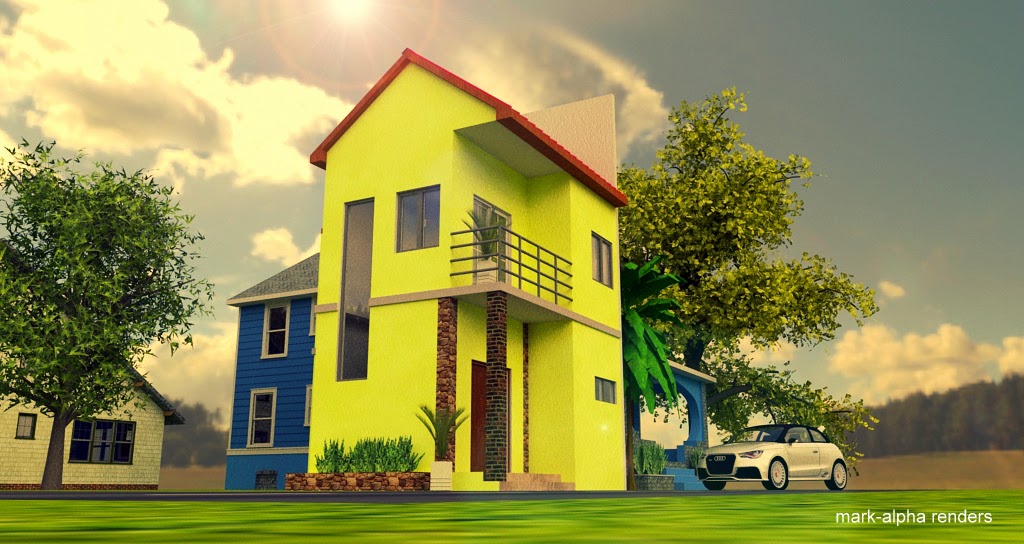
One admin of JAP Renders (Jeff Germono) received a request of Residential Project to be built by one family in the future. He spent two days of 3d modeling in Sketchup to present the architectural visualization of the said Two- Storey Residential Bldg.

Some of the details can be acquired personally from him.

Allow us to give you some photorealistic images we had created:

Germono's first proposal
The following are the final proposals:


OUR FIRST PAID PROJ,

We are glad to bring you our First Paid Proj. requested to us by one of our colleagues in Civil Engineering Academe:

softwares used: Autocad +sketchup+Thea+PS


Tuesday, October 28, 2014

JAP (SHORT DESCRIPTION)

The Short History and The Description of the Admins

JAP Renders was initiated by three BSCE students who are quite interested in CAD drawings and renderings. One of them is fond of 3d softwares especially Sketchup and another one in Autocad 2d drawings and Cost Estimation. Our new admin  on the other hand, shows determination in learning the Sketchup and has started to spend time with it.

JAP Renders uses programs which are being used by most of professional engineers and architects and by those who aspire to become one of those. The following are the programs and softwares we are currently using:

1.) Sketchup (3d modeling, 2d planning)
2.) Autocad (3d modeling, 2d planning)
3.) Kerkythea (Rendering)
4.) Thea (Rendering)
5.) irendernxt (Rendering)
6.) Twilight Render (Rendering)
7.) Adobe Photoshop CS6 (Photorealism)
8.) Microsoft Excel (Cost Estimation)
night time rendering with Thea Render

INTRODUCTION

Prologue

Hello readers and fellows, we are the administrators of J.A.P. RENDERS page ( JAP RENDERS FB PAGE)  and we are happy to bring you our blog  on which we are going to share and demonstrate some tricks and tips in computer-aided drafting, planning, designing and rendering 3d models into photorealistic images.

Allow us to educate people who are interested in this type of work. We are happy to serve, guide and draw for you. We are glad to draw your ideas into some sort of realism so that you may be able to visualize your designs through art of photorealism.


We in JAP renders are offering students an affordable price in making your projects feasible in the face of your instructors and professors. We care for your grades and for your academic remarks.

We will draw your ideas.